How to create a modern web site in 30 minutes for peanuts
Astro plus Tailwind on Netlify from Github and through Cloudflare. Oh my!
What will you get if you read this:
- new web site on your own domain
- working email alias
- fast and modern content-focused web framework
- cloud-based development environment
But my mind process worked the other way around, so let's dive in!
Summer holidays have just begun. There is a messenger of vacation time for me. Compulsive domain buying.
With freed-up time, I tend to come up with crazy new ideas that need an website. Typically this lasts till the next thing. And then back in circles.
Astro web framework turns v1.0
This summer all of the stars have perfectly aligned. Namecheap had a summer discount on .coms (the only TLD I recognise), Astro web framework turned v.1.0, and Codeanywhere is preparing a new release.
Astro is a web framework for building fast, content-focused websites. In the course of the last 16 months it has amassed more than 13.000 stars on GitHub.
With Astro you can build with your favorite UI framework (React, Preact, Svelte, Vue, Solid, or Lit). Pull from your favorite content source (CMS, Markdown, Databases, and APIs). Deploy to your favorite hosting provider with a single command (Netlify, Vercel, AWS, Docker and more).
You could also read their docs to see how it compares to likes of Gatsby, Hugo, Jekyll, Next.js and others.
Astro has shown we can bring the simplicity of the early web back to modern web development. It unifies the web ecosystem such that no matter if you are using the most popular libraries with React to the newest compiled syntax from Svelte you feel equally at home.
-- Ryan Carniato, Creator of Solid.js
Obviously, the domain happened first.
It was an impulse buy as ever. So now I am a proud owner of roundcopy.com.
It sounded well-rounded (lousy pun intended), and I pulled the trigger intending to host some of my ludicrous concepts around the revolutionary marketing copy creation process. Maybe something involving GPT-3 and DALL·E 2. Who knows? Let’s see where this will lead me this time.

CrAIyon (poor man's DALL·E) prompt: "brad pitt looking cool with sunglasses drinking a beer on the beach sea and sand programming on a laptop in a codeanywhere sunset film scene and very, very, very pretty"
Step 1. Setting up the domain and DNS
First, I went to Cloudflare and used their nameservers to set up the Namecheap to point to them.
While there, the next step was to deal with the email and set the MX records in our DNS settings. Those you can find in the next step.
The easiest thing to do with a new domain is to set the alias and email redirects to your main email account.
So I went to ImprovMX and, using their free tier, set up the email redirection to my primary email account.
Step 2. Setting up an email alias
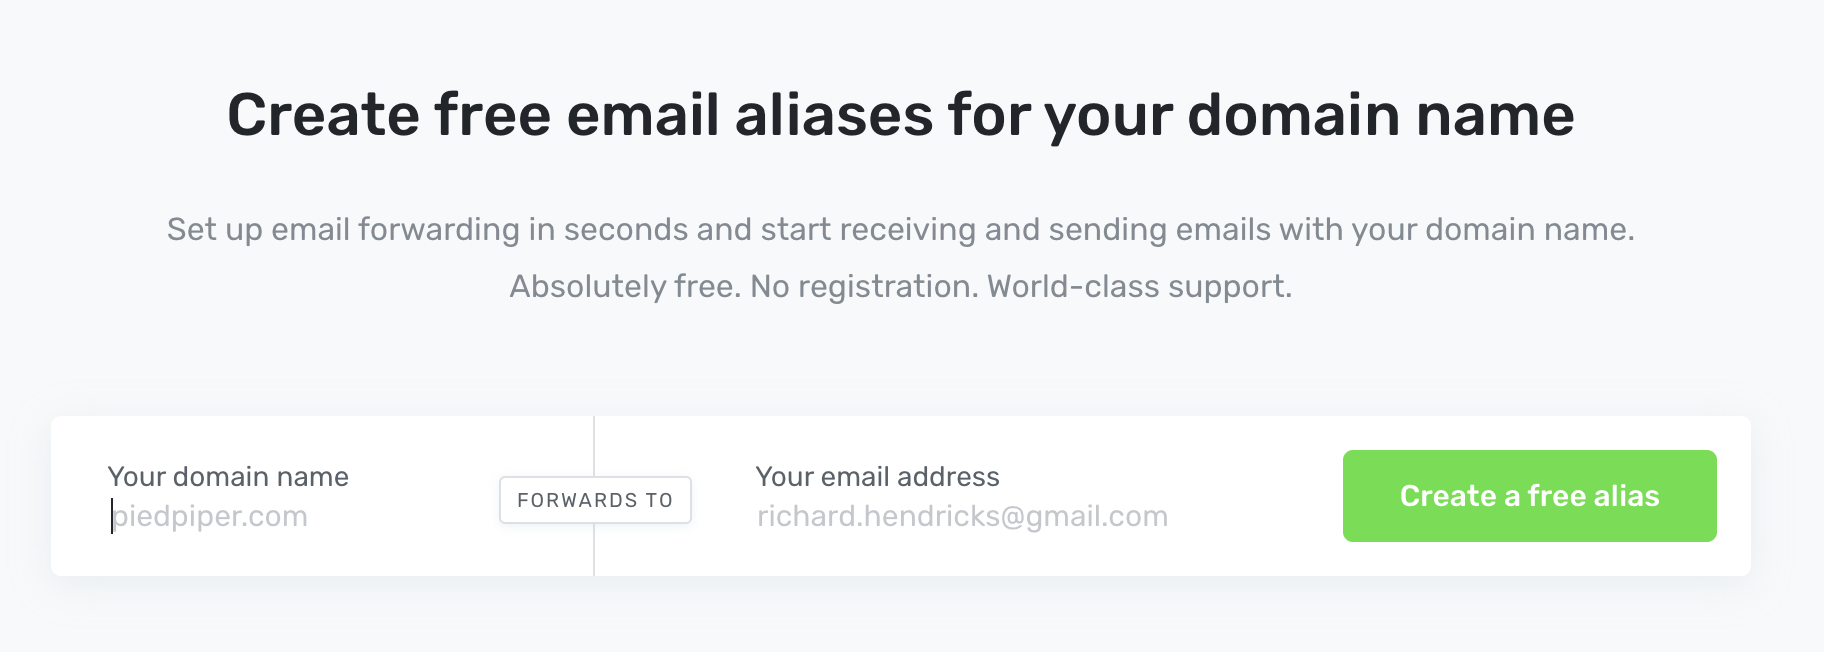
ImprovMX - create free email aliases for your new domain
ImprovMX is just plain fantastic. There is no need to “register” the account by filling out the tedious forms.
You just need to enter the new domain and an old email where you wish to receive the new emails. This will lead you to the page with their MX and SPF records which you need to copy and paste into the Cloudflare DNS section.
Once this is done, just click “Check” in ImprovMX, and if everything is ok, you will get a green light if everything is okay. Keep in mind that DNS changes do need some time to be propagated.
Now we have a working email on a new domain and can receive emails.
Therefore, we can create new accounts all over the internet with the new address. As a side note, ImprovMX also has catch-all emails, so there is no need for setting up aliases. This is useful as you can use whatever email address you wish. For example, you can use github@something.com when registering a new GitHub account.
This way, you can easily filter emails later or see who shares your emails with spammers.
Usually, I would immediately go to Github and use their Pages together with Jekyll (written in Ruby and great for simple and fast static sites).
But I couldn’t find any theme to my liking, and I was itching for a change.
Step 3. Astro, a content focused web framework
Hacker News to the rescue.
While taking a short break browsing HN, my eye immediately caught the news about the v1.0 release of the Astro framework.
Astro is a next-gen island architecture for super fast content-driven websites.
First things first, let’s check out the themes available.
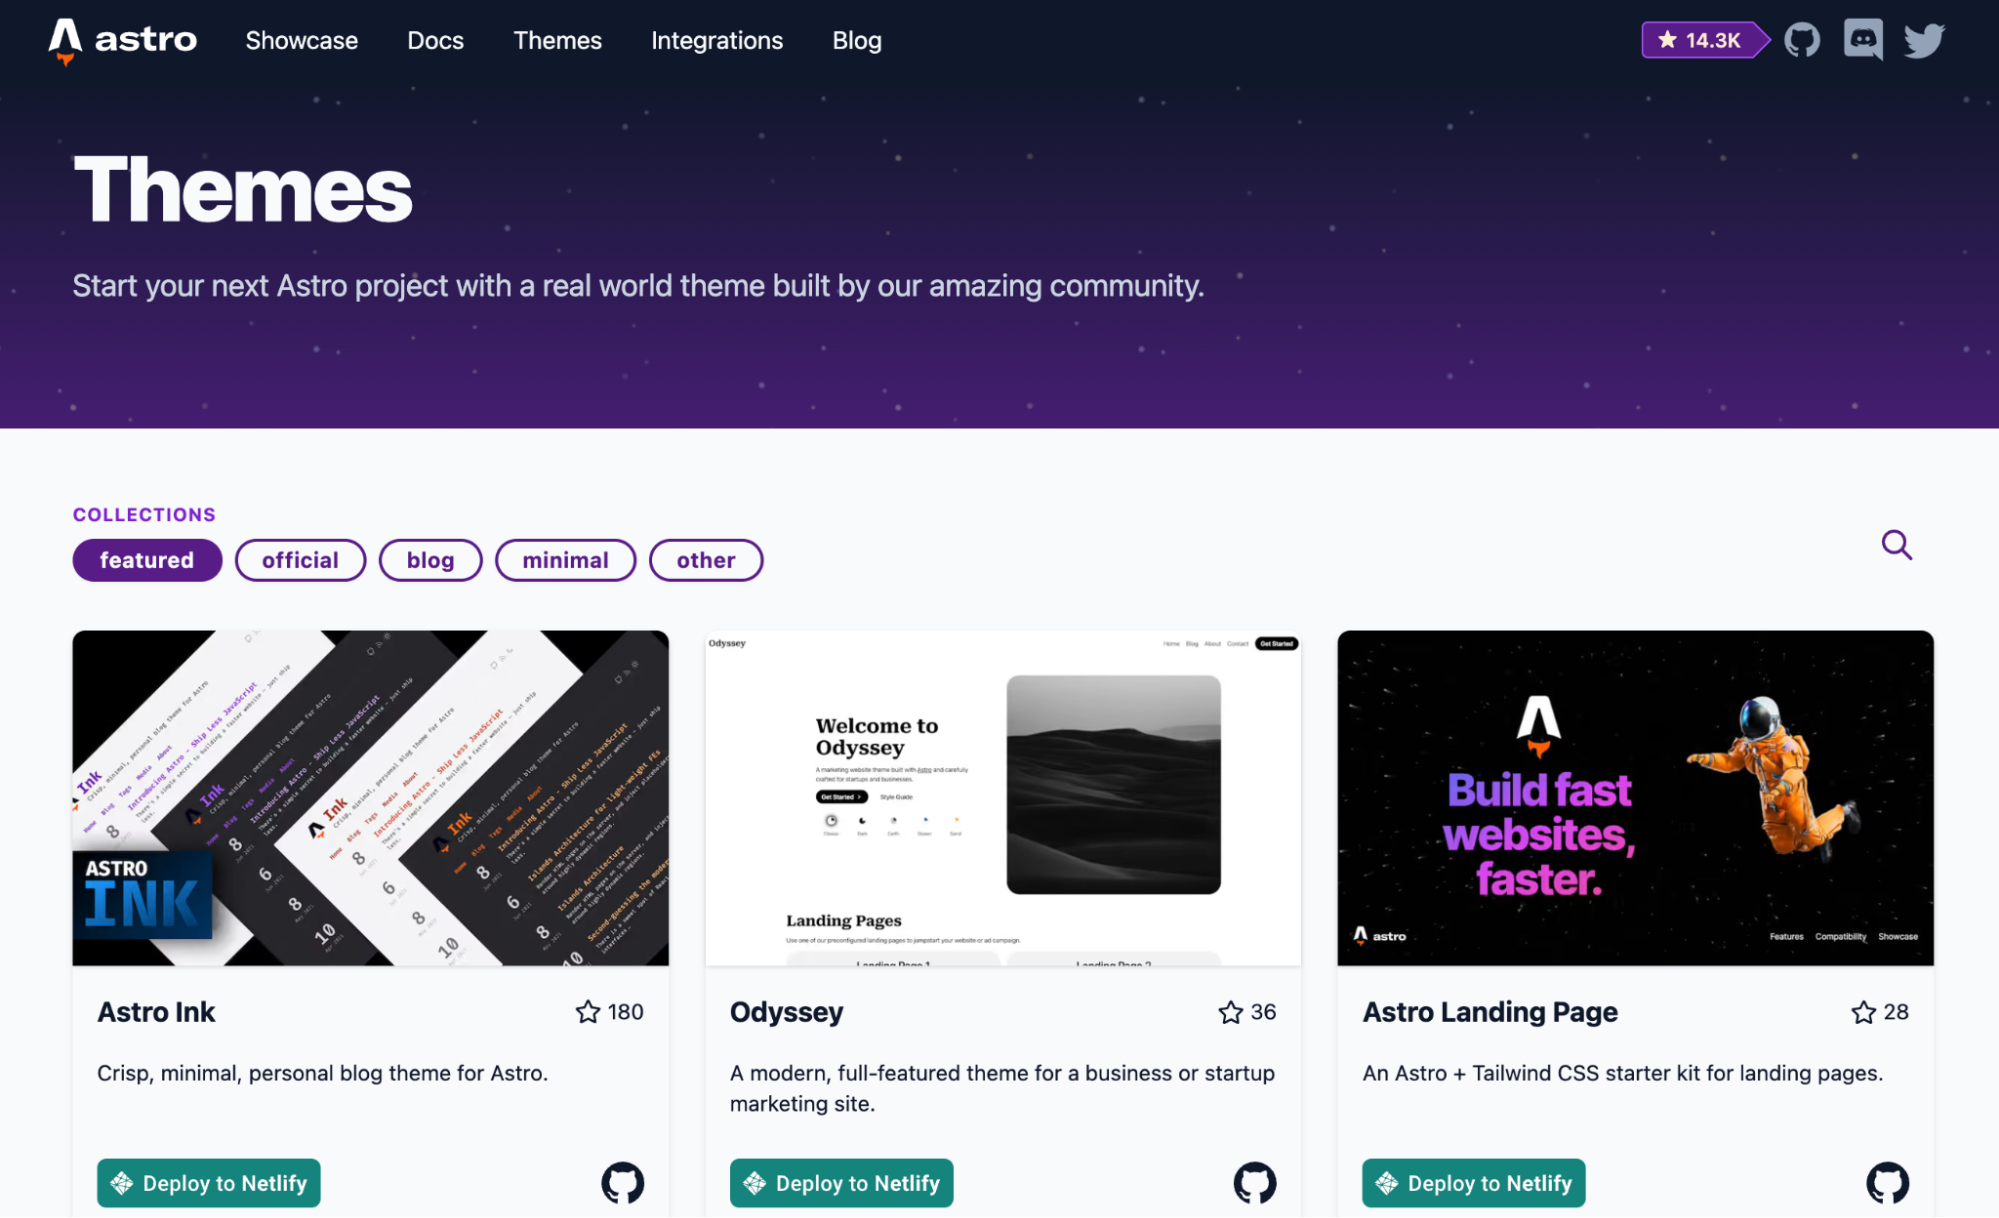
Selection of themes for Astro web framework
Astro has an exciting selection of themes and an excellent showcase for everyone's liking. I went for Astrowind which provides an excellent integration with Tailwind CSS. And they claim 100 Performance, 100 Accessibility, 100 Best Practices, 100 SEO scores in Lighthouse and PageSpeed Insights reports.
Even better, there is a green and prominent “Deploy to Netlify” button.
After a click and some magic, which included connecting my Github account, the site was up and running.
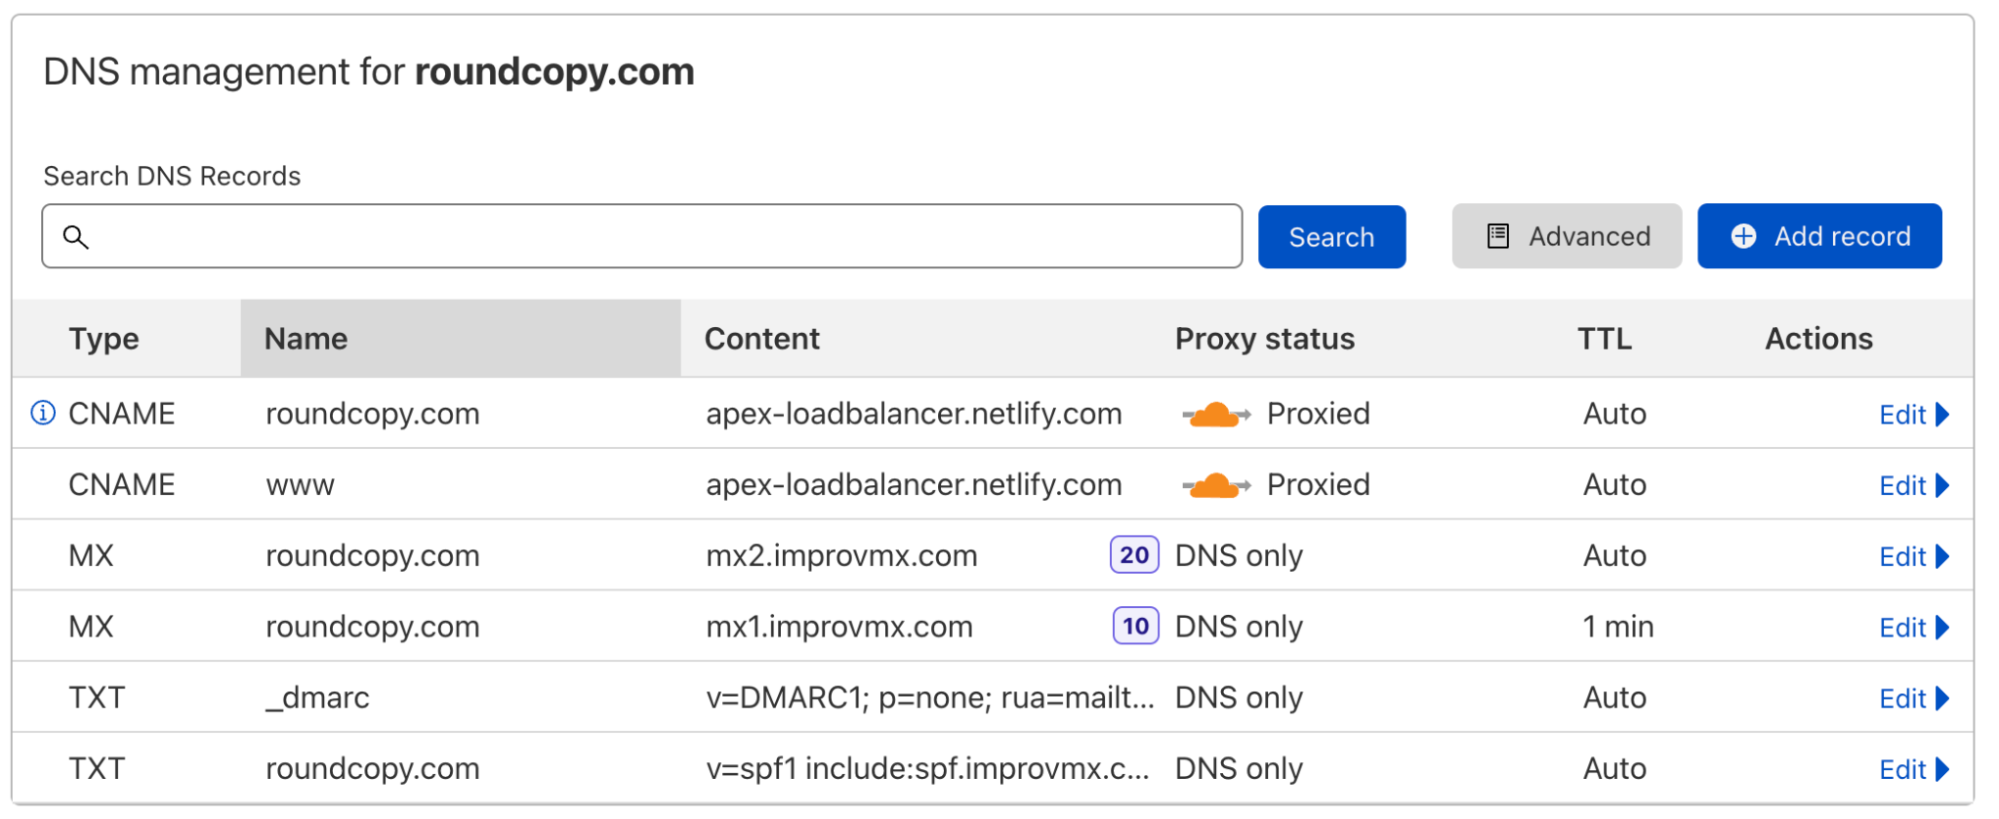
Cloudflare DNS setup
As every magician can tell you, magic is hard work.
So, I had to set the DNS records in Cloudflare to point to Netlify.
While you are there, go through the settings and set the HTTPS as default, and please do go slowly through other options.
Cloudflare will automatically issue you a free SSL certificate, which is excellent as a few years ago this was hard work.
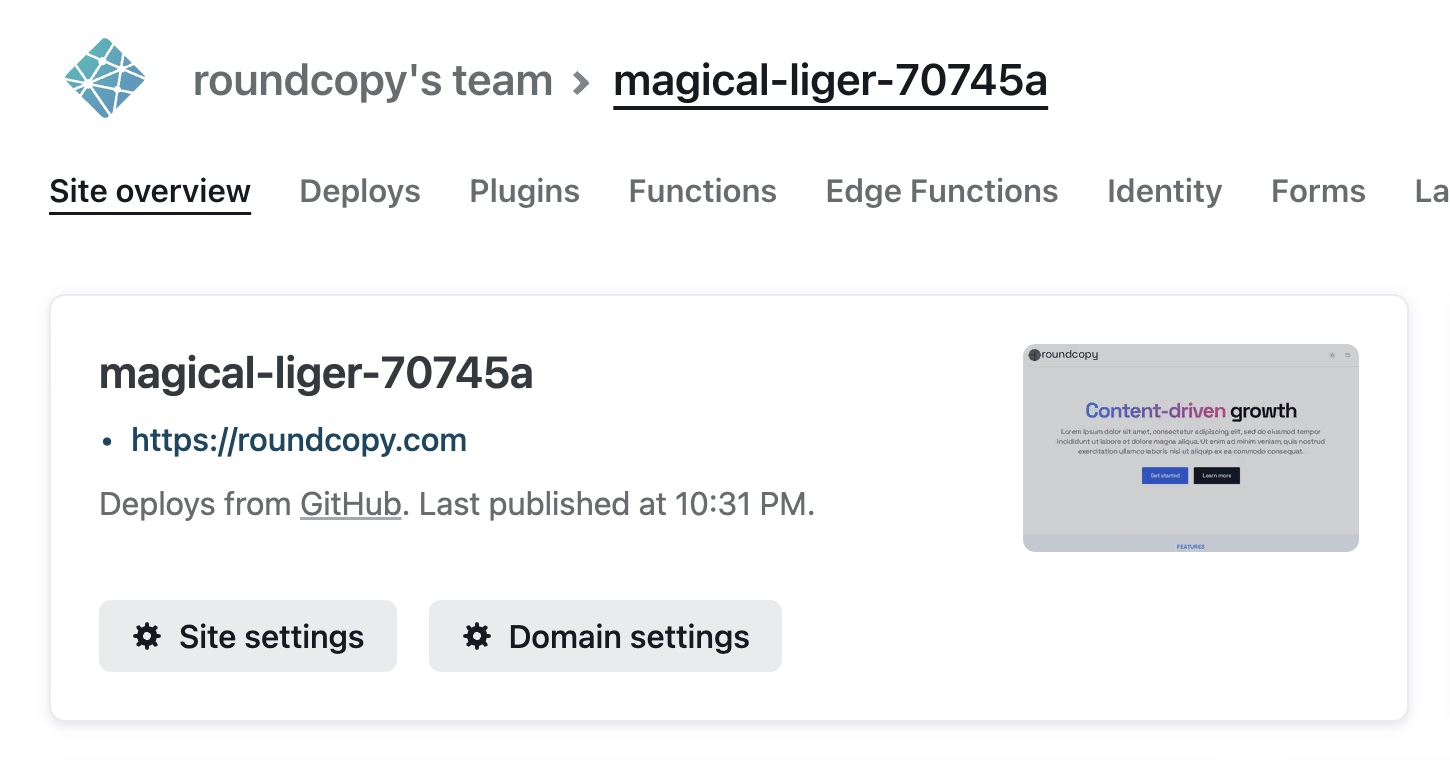
Success, Netlify running the new website
Step 4. Performance test
Now we have a live website. Looks nice, doesn’t it?
I have also run it through Google's PageSpeed Insights just for fun.
Out-of-the-box results are remarkable, 99 on desktop and 96 on mobile. Not the claimed 100, but I'll have to investigate it on some other occasion.
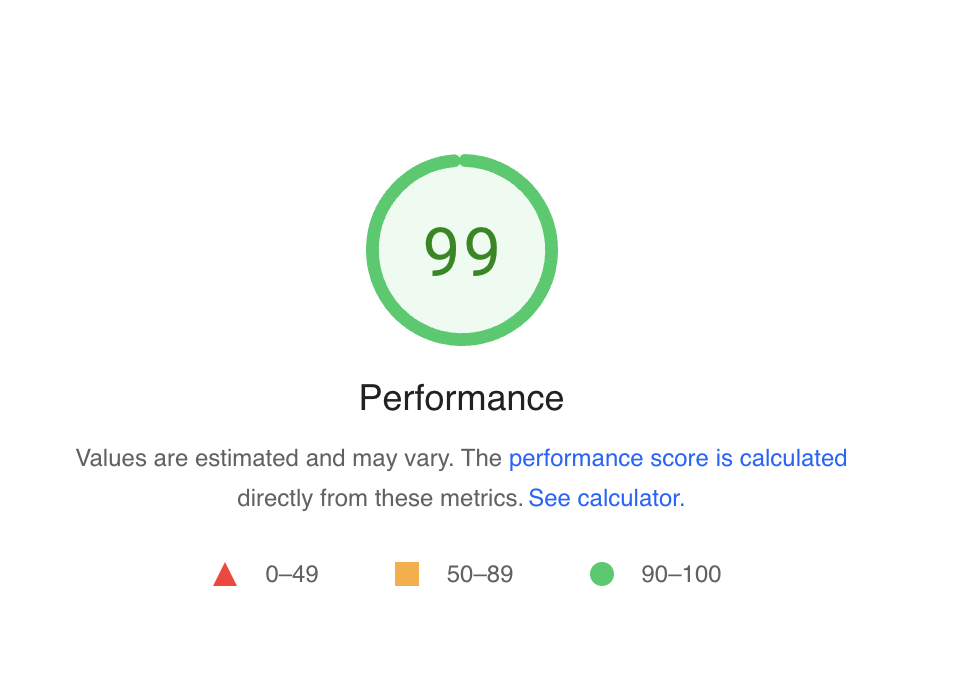
Google PageSpeed Insight result is great
Step 5. Setting up development environment with Codeanywhere
Now, you may ask, how can we customise this and make it our own?
We need to set up our development environment.
You could clone the repository with git to your local machine and start with tweaking and content creation.
But up to this point, we are 100% in the cloud. Let’s keep it like that.
This will give us several benefits.
We can create a unique environment that we can run when needed — no need to mess with the stuff you already have on your computer.
Also, we will have it at our disposal wherever we go and 24/7. If we like, we could connect to it from our mobile or office PC.
Having Codeanywhere account at my disposal, this part was even easier.
I have used my Basic account to create a new container.
But before that, I connected Codeanywhere to my GitHub account and added the SSH key provided by Codeanywhere (under Account) to my Github settings.
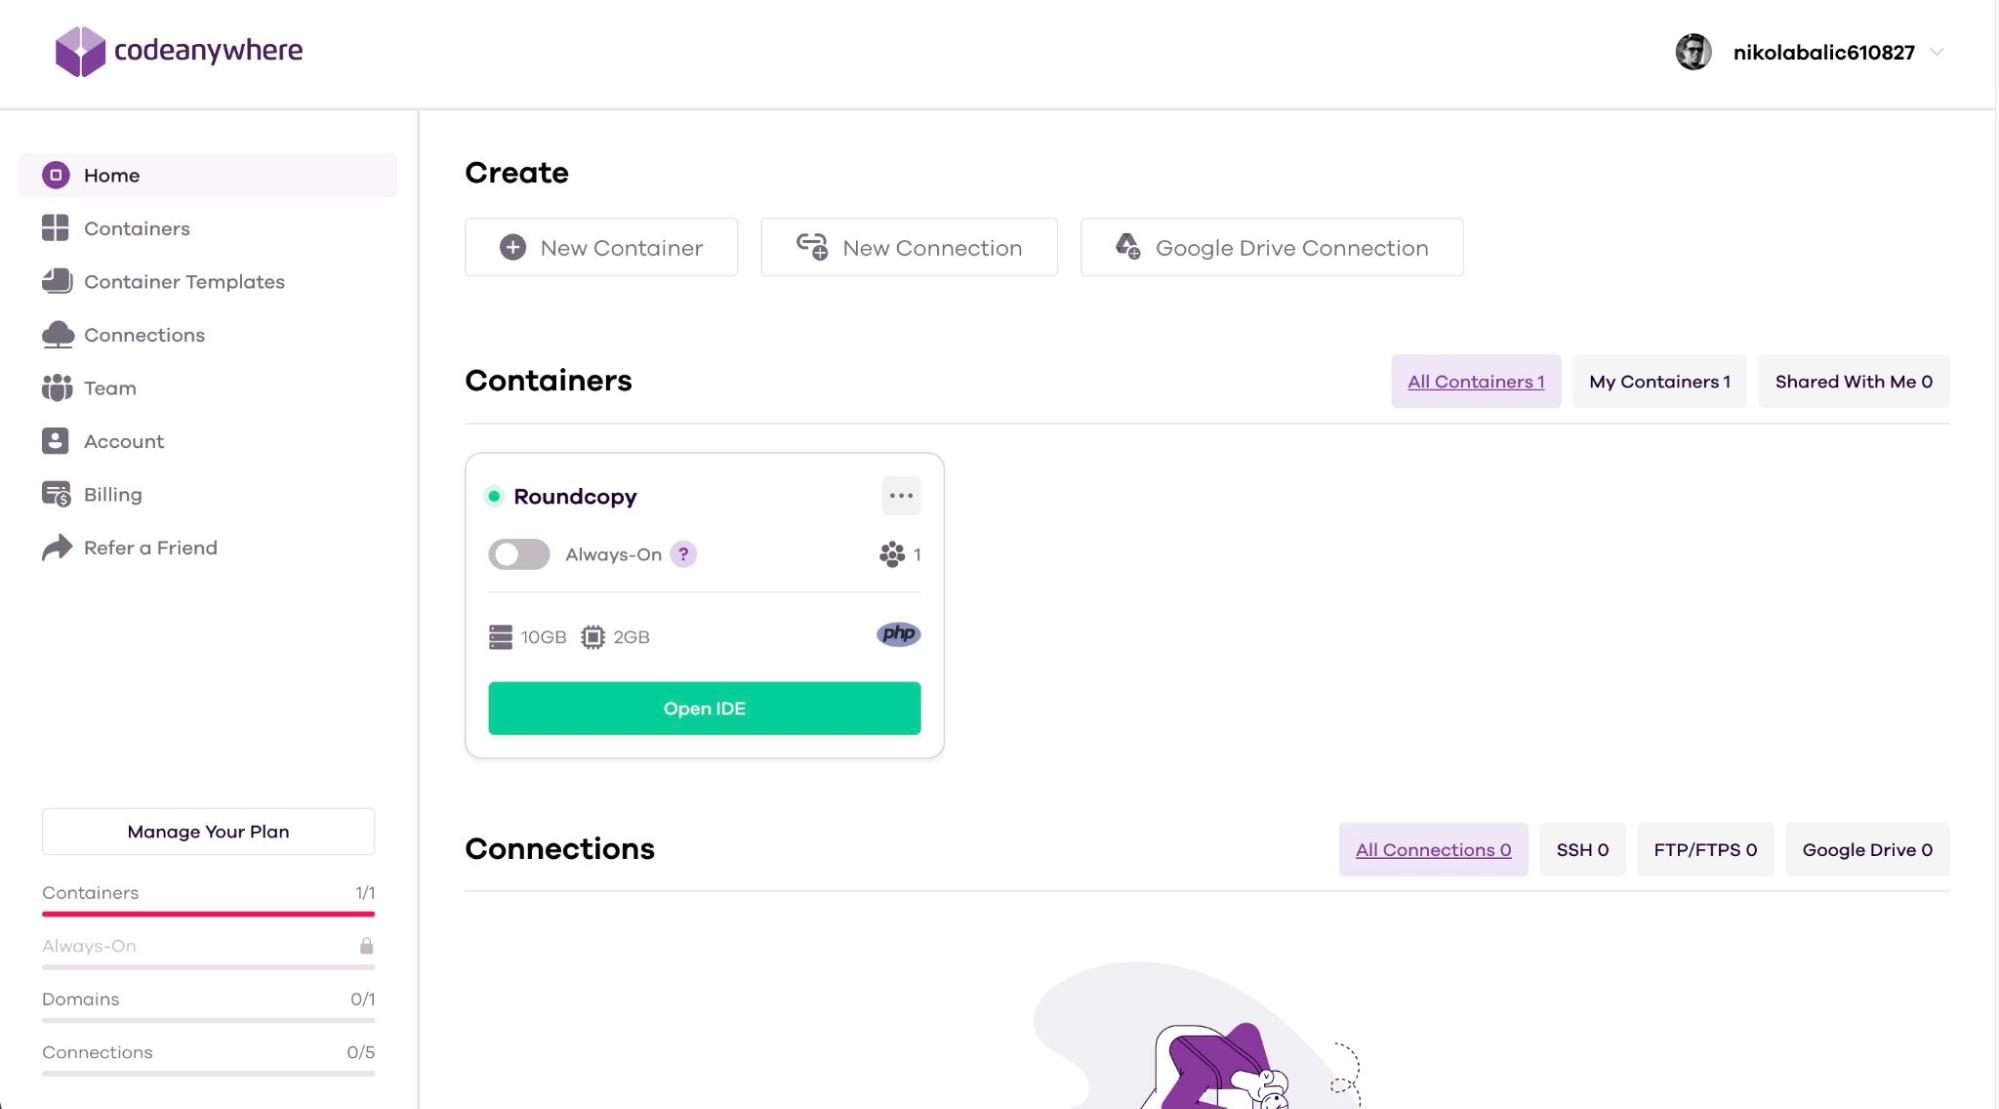
Codeanywhere dashboard showing our running instance
Opening the Codeanywhere IDE, I have created a new project and cloned the git repository created earlier. This is as easy as clicking randomly on the IDE interface.
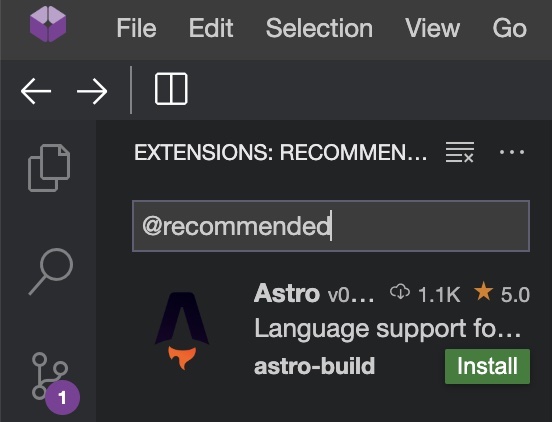
Codeanywhere automatically recommends the Astro extension
At this stage, I was faced with a pop-up in which Codeanywhere is suggesting I install the Astro extension, which I have joyfully accepted, and now I have .astro code highlighting. Grand.
Sidenote. You can install any of the many VS Code extensions in Codeanywhere.
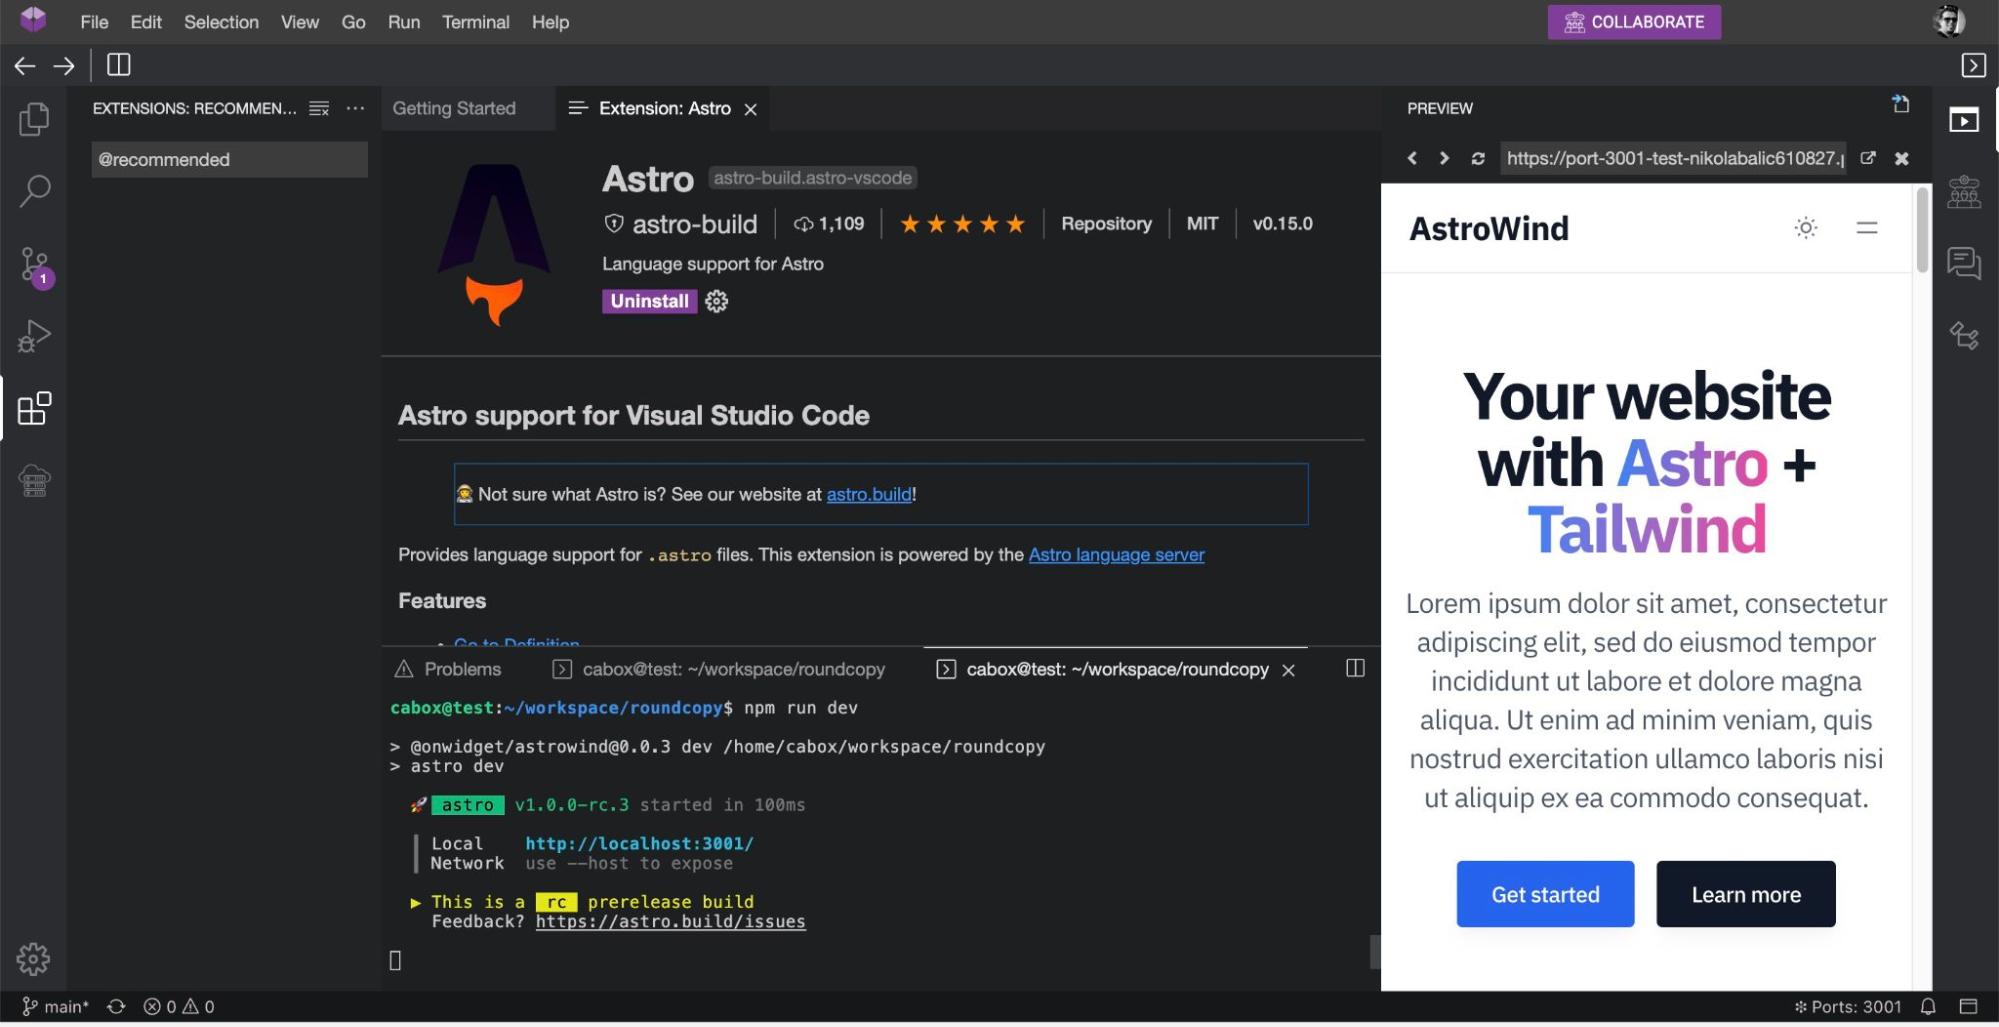
Voila! The web is now running in our cloud IDE
Now it is just a thing of typing some commands in the terminal.
npm install & npm run dev
The last command will result in a pop-up inside the editor which asks you if you wish to start a preview window.
And voila, now you have the same website in your cloud dev environment.
Fun times, but the most critical part should follow. I need to edit the code and create engaging content to make this new domain meaningful.
Stage. Commit. Push.
How much the new web will cost you?
I have promised peanuts in the title, haven't I? So the bill of works is:
- $7.16 once for one .com domain name (35% summer discount from Namecheap)
- $3.60 monthly for Codeanywhere Basic account (2 years discount of 40%)
You could go the easy route and just go with a Codeanywhere Standard subscription. Which will set you back $9 each month. With it you can have an Always-on container on which you can quickly deploy Astro on your own domain.
To make things a little bit easier on the content creation side you could use a headless CMS such as Storyblok. They have a free community account for one user, which could be just enough for you. But this could be a whole new blog post.
Let’s hope for the sake of my mental health that this time I will push this to the end. Alas, there are “officially” 14 more days in my vacation. :)