Web coding lesson 1

So you want to build a website? This little course is in itself a website. But it is also a web application. Huh? What’s the difference? This question and several others about getting set up for web development are addressed in this lesson.
By the end of this lesson, you’ll be able to:
- Use a remote service for creating and editing web pages
- Set up your computer to develop websites locally
- Use the basic page structure HTML tags to set out a web page
- Know how a basic website structure works
- Link pages together with the anchor tag
1. Using Codeanywhere
There are a number of remote (web-based) services that provide everything or most of what you need to develop for the Web.
The idea behind these services is providing editors for coding and a developer environment, all inside your web browser.
One such service is called Codeanywhere. Sign up for a free account and you’ll be presented with a screen like this:
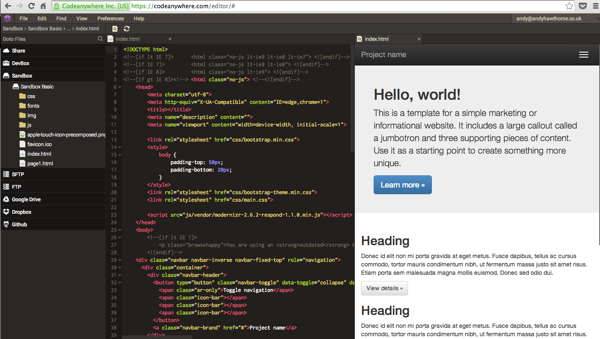
It looks like there is a lot going on. Fear not, we’ll work through all the options in good time. For now, we’ll focus on creating some simple HTML documents.
DropBox
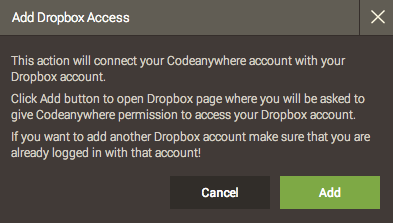
If you have a DropBox account, you’ll see an option in the left pane to connect to your DropBox account and save your files there.
When you click the DropBox option, you’ll be presented with this:
Clicking the Add button takes you to the DropBox website and you will see this screen:
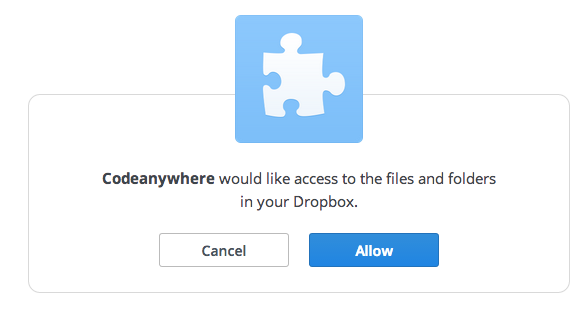
If you click “Allow”, Codeanywhere will be allowed to connect to your DropBox account. That means you can use the DropBox file system to create files and folders to store the web pages you create. And using DropBox means that you can work on your files anywhere you choose.
Now that you are connected, you can right-click on the DropBox icon to display the context menu:
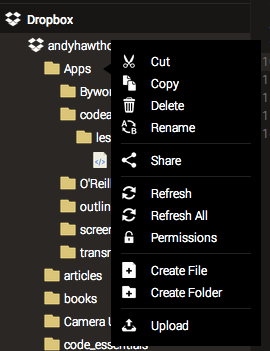
You’ll see that you can create folders and files. Create a folder called lesson1 and then, inside that folder, create a file called index.html.
The index.html file has a special meaning on a web server with software such as Apache running it. This file will be considered the home page of the website.
A very basic web page
Let’s make a page.
First, we’ll need a document-type declaration so that the web browser knows what type of document is to be displayed. Then we need basic structure tags. Hang on... tags? What are they?
Tags are the stuff you see between angle brackets like this: <html></html>. Don’t worry; soon you’ll be using so many of these that you’ll know the common ones by heart.
Without further ado, here is a common page structure you’ll need for any page that you build:
<!DOCTYPE html>
<html>
    <head>
        <meta charset="UTF-8">
        <title></title>
    </head>

    <body>
    </body>

</html>
You can add this code to your index.html file you have in Codeanywhere. Let’s go through what we have here:
<!DOCTYPE html> - This is the document declaration which tells the browser what type of document it’s about to display. This is the HTML 5 document type. There are previous versions of HTML, but we are going to focus on the most current version.
<html></html> - We then have opening and closing html tags that mark out the beginning and end of the document.
<head></head> - Next, we have the head of the document. This shouldn’t contain any content that you want to display in the browser. The document head is for meta data (more about that as we go along) to inform search engines about our page. The document head is also the place where we usually load additional style sheets and scripts (you’ll learn about these later).
<meta charset="UTF-8"> This line determines the character set the document uses. This one is fine for the English language. In fact, this is one of those lines of code that you can add to your document and forget about.
<title></title> The title of your page. This is very important information for search engines to list your site in search results.
<body> </body> Everything you want to be displayed in the browser should go between the opening and closing body tags.
Viewing the page
You can now locate the file in the DropBox file system on your computer, double-click it and it will open in your browser. It will display… nothing. That’s because we don’t have anything written between the <body></body> tags.
It’s important to understand that a web browser does not behave like a word processor. If you type stuff into a HTML document without formatting, it will be rendered exactly like that – unformatted.
We have our file in DropBox, but let’s look at how we can use Codeanywhere to preview the pages we create. Back in the Codeanywhere editor, you’ll see you have a Sandbox:
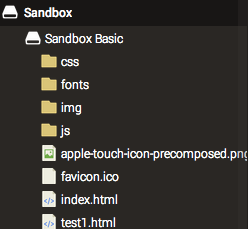
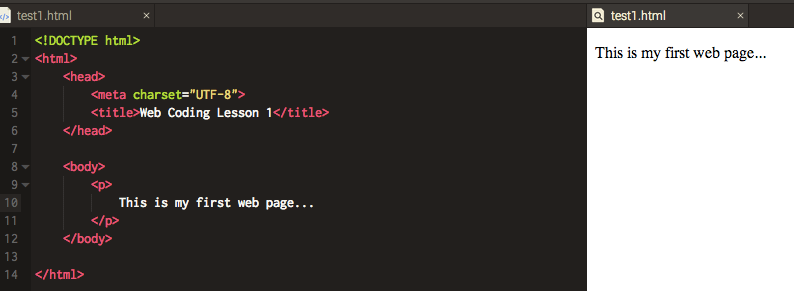
We can use the Sandbox to create files directly inside Codeanywhere and then preview what they’ll look like. Right-click on the Sandbox icon and choose the Create File option. Name your file test1.html. Now type (it’s good practice) or copy and paste in the page structure tags we’ve already used.
However, this time in between the <body></body> tags and this:
<p>This is my first web page...</p>Now you can preview the (admittedly boring) page by saving and then clicking the Browse button (the magnifier icon) in the top toolbar of Codeanywhere.
Codeanywhere has a number of other useful features, but we’ll cover them in later lessons.
2. Setting up DevBox
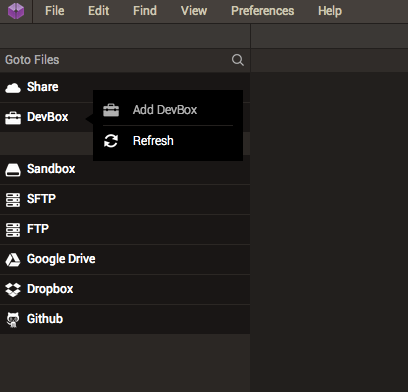
You can create a new DevBox by right-clicking the DevBox tab in the File Explorer and selecting “Add DevBox” from the list:
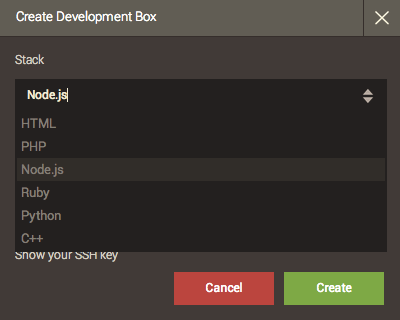
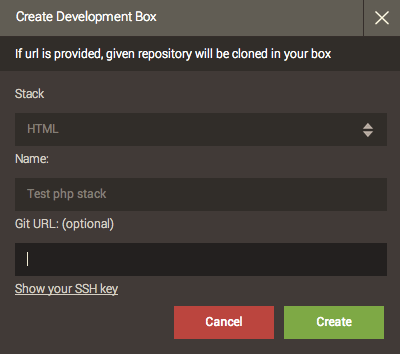
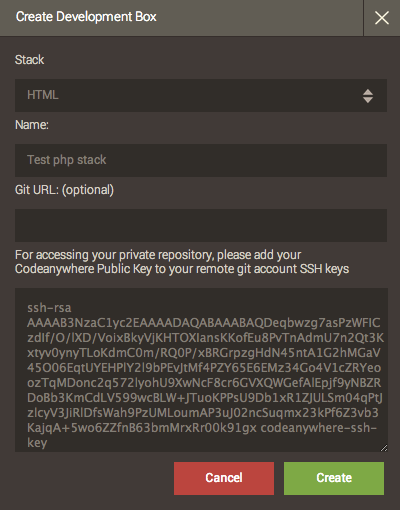
After you select Add DevBox, the “Create Development Box” window will open. Here you can select the stack you want to use, enter the name of your DevBox which will be shown in the File Explorer and, if you have an existing Git repository you want to work on, enter the url of that Git repository.
- Note that you have to authorize your Codeanywhere public key if the Git is private (for more information, please visit the Bitbucket documentation where the whole process is explained in detail).
After you select and enter all the data, click on the Create button. Your DevBox will be created and an icon representing it will be added to your File Explorer under the DevBox tab. Right-click the newly created DevBox to access additional options:
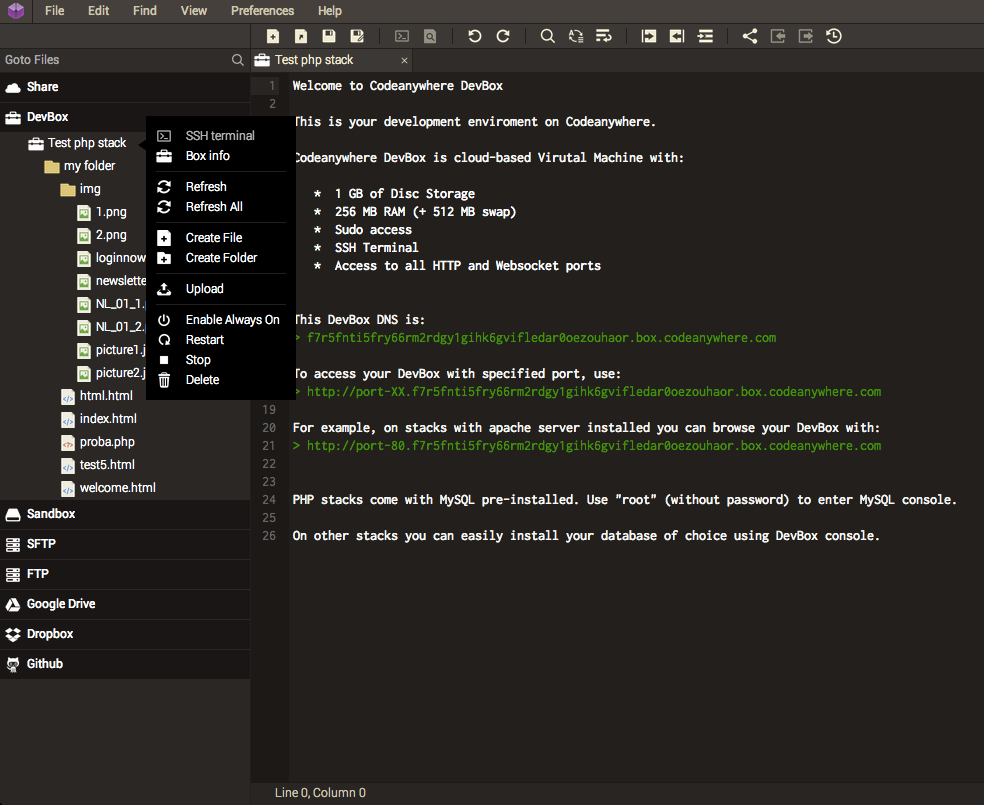
Using SSH Terminal, you can install additional tools and manage your DevBox. Depending on the chosen stack, your DevBox instances can be based on CentOS or Ubuntu Linux distribution so you can easily find all the information on the net.
In the next lesson, we’ll continue to build our knowledge of the HTML tags we can use to create web pages. You will also be introduced to Cascading Style Sheets (CSS).
We kindly thank Andy Hawthorne who originaly wrote this article.